Altaro Offsite Backup
Author: b | 2025-04-24
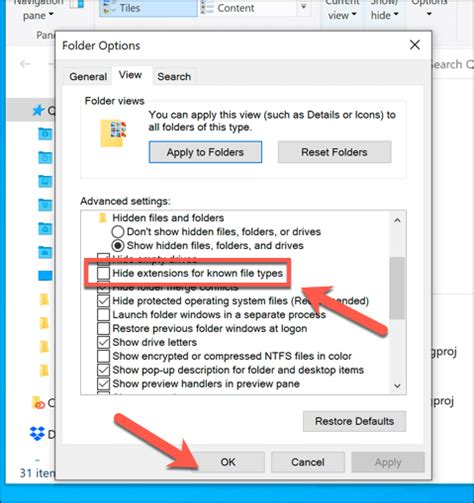
With Altaro VM Backup, setting up offsite backups to a NAS without the use of the Altaro Offsite Server is possible. Without the use of the Altaro Offsite Server, you can configure offsite

Altaro VM Backup: offsite copies to your Altaro Offsite
Bandwidth Throttling for Offsite Backups / Replication If you're taking offsite backups over the WAN / VPN / Fiber connections or even running Replication and especially going over a slow connection, you might be looking to throttle the bandwidth available for the offsite backups via VM Backup.VM Backup does not offer throttling natively as it stands, but fortunately Windows gives you the functionality to do this built-in.Version 9All you have to do is open PowerShell and run the following command on the VM Backup machine and ALL Hyper-V Hosts:Syntax for Offsite Backups going to an Offsite Backup Server:New-NetQosPolicy "OBS Throttle" -IPDstPortStartMatchCondition 36000-IPDstPortEndMatchCondition 36001 -ThrottleRateActionBitsPerSecond 10000000Syntax for Offsite Backups going to a Cloud Backup Location:New-NetQosPolicy "Cloud Backup Throttle Port 80" -IPPort 80 -IPProtocol TCP -ThrottleRateActionBitsPerSecond 10000000 -AppPathNameMatchCondition 'C:\Program Files\Hornetsecurity\VMBackup\VMBackup.SubAgent.exe'New-NetQosPolicy "Cloud Backup Throttle Port 443" -IPPort 443 -IPProtocol TCP -ThrottleRateActionBitsPerSecond 10000000 -AppPathNameMatchCondition 'C:\Program Files\Hornetsecurity\VMBackup\VMBackup.SubAgent.exe'Syntax for Replication:New-NetQosPolicy "OBS Replication Throttle" -IPDstPortMatchCondition 36100 -ThrottleRateActionBitsPerSecond 10000000The ThrottleRateActionBitsPerSecond must be specified in bits. So for instance;3 Mbps = 3000000 Bits10 Mbps = 10000000 BitsNote:For VMware hosts, this only needs to be applied on the machine running VM BackupIf you wish to remove the QoS Policies, you can run the following commands:Remove-NetQosPolicy -Name "OBS Throttle"Remove-NetQosPolicy -Name "Cloud Backup Throttle Port 80"Remove-NetQosPolicy -Name "Cloud Backup Throttle Port 443"Remove-NetQosPolicy -Name "OBS Replication Throttle"Version 8All you have to do is open PowerShell and run the following command on the VM Backup machine and ALL Hyper-V Hosts:Syntax for Offsite Backups going to an Altaro Offsite Server:New-NetQosPolicy "AOS Throttle" -IPDstPortStartMatchCondition 35116 -IPDstPortEndMatchCondition 35117 -ThrottleRateActionBitsPerSecond 10000000Syntax for Offsite Backups going to a Cloud Backup Location:New-NetQosPolicy "Cloud Backup Throttle Port 80" -IPPort 80 -IPProtocol TCP -ThrottleRateActionBitsPerSecond 10000000 -AppPathNameMatchCondition 'C:\Program Files\Altaro\Altaro Backup\Altaro.Services.BackupAgent.exe'New-NetQosPolicy "Cloud Backup Throttle Port 443" -IPPort 443 -IPProtocol TCP -ThrottleRateActionBitsPerSecond 10000000 -AppPathNameMatchCondition 'C:\Program Files\Altaro\Altaro Backup\Altaro.Services.BackupAgent.exe'Syntax for Replication:New-NetQosPolicy "AOS Replication Throttle" -IPDstPortMatchCondition 35120 -ThrottleRateActionBitsPerSecond Hola a tod@sEn esta oportunidad continuaremos viendo el software Altaro VM Backup y profundizando en las diferentes opciones que nos ofrece. En este post veremos en concreto como poder integrar Altaro VM Backup con Wasabi Hot Cloud Storage.Al integrar Wasabi nos permitirá almacenar nuestras copias de seguridad en una ubicación externa, lo que es ideal para fines de recuperación ante desastres. Además todas las copias de seguridad están cifradas (AES de 256 bits) de forma nativa.Prerrequisitos:Asegúrese de estar ejecutando Altaro VM Backup versión 8.5 o posterior para hacer uso de esta funciónDebes ejecutar Unlimited Plus Edition para poder acceder a esta función.Notas importantes:Cada instalación de Altaro VM Backup debe hacer uso de un Wasabi Bucket diferente.Wasabi Compliance Mode no es compatible (ya que los derechos de eliminación se limitarían solo a Wasabi).Integrar Wasabi con Altaro VM BackupPara comenzar, abrimos la consola de Altaro VM Backup.Ya en la consola, vamos a la pestaña “Backup Locations” y acto seguido pulsamos sobre “Add Offsite Location” como se muestra en la imagen.Dentro de las opciones disponibles, seleccionamos “Wasabi“.Agregamos los datos de nuestra conexión con Wasabi. Tenemos que agregar el nombre exacto de como nombramos nuestro bucket en Wasabi para evitar errores, probamos la conexión para verificar el correcto funcionamiento.Dentro de lista de máquinas virtuales disponibles en nuestra infraestructura, tomamos la(s) máquina(s) virtual(es) y la(s) arrastramos hasta “Offsite Locations“. Ya seleccionada la maquina(s) virtual(es), vamos a la parte inferior derecha de la consola y pulsamos sobre “save changes” para finalizar y guardar los cambios.Altaro VM Backup nos pedirá crear una contraseña maestra para encriptar nuestras copias de seguridad fuera del sitio.En mi caso en esta ventana, selecciono la máquina virtual que configure en “Offsite Locations” y pulso sobre “Take Offsite Copy” para comenzar el respaldo. Como podrán notar, no es posible seleccionar las demás máquinas virtuales ya que no se agregaron en pasos anteriores.En la ventana de Dashboard, podremos ver el avance de nuestra tarea de respaldo a Wasabi.Verificar respaldo en WasabiIngresamos a página de Wasabi con nuestras credenciales.Dentro de la pestaña “Buckets” vamos al bucket que configuramos en Altaro VM Backup e ingresamos en este.Ya en el bucket, podremos navegar dentro de este y ver que Altaro VM Backup creo varios archivos dentro del bucket.Con estos simples pasos podemos integrar Wasabi con nuestra solución de respaldo Altaro VM Backup y poder almacenar nuestros respaldos en la nube y así también poder cumplir con la regla de 3-2-1. Espero que esta información pueda ser de ayuda y cualquier duda, consulta o sugerencia la dejan en los comentarios. Saludos.Altaro VM Backup: offsite copies to your Altaro Offsite Server
Do is put a check in the Application Consistent column for each virtual Domain Controller. You find these settings under VSS Settings in Altaro VM Backup. Tip! Check the VMware ToolsTo offer the best integration between the virtualization host and guests, VMware offers VMware Tools. Similarly, Hyper-V offers Integration Components (ICs). Hyper-V’s ICs come with the Windows Server Operating System (OS) and are automatically kept up to date through Windows Update. VMware Tools, however, need to be installed inside the virtual guest and require somewhat more effort to keep up to date.It is easy to forget to install the VMware Tools on virtual Domain Controllers. It is easy to not have the latest VMware Tools on virtual Domain Controllers. Don’t make these mistakes, as application consistent backups rely on them. Tip! Check the VSS writersWhen you create a backup of Domain Controllers using the relevant VSS writers, an event is logged in the Event log. This event has event ID 1917 with source ActiveDirectory_DomainService and is recorded in the Directory Services event log (underneath Application and Services logs).When Active Directory-aware backups do not occur, you can check the relevant VSS writers for errors:The NTDS VSS writer should report no errorsThe DFS Replication VSS writer should report no errorsBoth writers can be checked with the following line of code in an elevated Command Prompt (cmd.exe) window on a (virtual) Domain Controller:vssadmin list writersThe output of the command lists all the VSS writers on the system. The relevant VSS writers are among them. Tip! Backup to a location outside of the reach of Active DirectoryOne of the other mistakes I see admins make is to write all domain controller backups to a (networking) location that is governed by access control lists (ACLs), filled with Active Directory principals. When Active Directory is unavailable, that location is unavailable, because you gained access to it through one or more Active Directory group memberships. Make sure you create backups of Domain Controllers in locations, whose access is not governed by Active Directory or IPSec. Then, make use of the Offsite Copies functionality in Altaro VM Backup. With Altaro VM Backup, setting up offsite backups to a NAS without the use of the Altaro Offsite Server is possible. Without the use of the Altaro Offsite Server, you can configure offsite Altaro Offsite Server. If you're looking to replicate VM backups to an offsite location you will need to install the Altaro Offsite Server on the machine that will host the offsite backups in your remote location. The Altaro Offsite Server can be connected to the machine running an instance of Altaro VM Backup both via LAN or WAN connection.New in Altaro VM Backup - Offsite Backup to Azure - Altaro
Altaro VM Backup es una solución de copia de seguridad y replicación de máquinas virtuales para Hyper-V y VMware. Diseñado para departamentos de TI, revendedores y consultores de TI, y proveedores de gestión de servicios (MSP), proporciona una funcionalidad robusta y optimizada a nivel empresarial, como la replicación optimizada de WAN, CDP, deduplicación en línea aumentada, entre otros. Se caracteriza por la facilidad de uso, la velocidad, la asequibilidad y una garantía de respuesta a llamadas de Lightning Fast Support de menos de 30 segundos.Algunas de las ventajas de usar Altaro VM Backup:Interfaz de usuario intuitiva y fácil de usar, lo que simplifica la implementación de una estrategia de respaldo confiable.Rápido, sencillo de administrar y configurar tareas de copia de seguridad / restauración y replicación en múltiples hosts.Control total y escalabilidad : Supervise y administre todos sus hosts de Hyper-V y VMware desde una única consola.No se requiere capacitación : Altaro VM Backup es fácil de usar y a diferencia de los productos de la competencia, no requiere que obtenga una certificación para poder administrarlo y ejecutarlo.Descargar ALTARO VM BackupVamos a la página de Altaro VM Backup para poder descargar el software. Ya en la página hacemos clic en “descargue su prueba gratuita“.Una vez en la página tendremos 2 opciones para poder descargar Altaro VM Backup, una versión de prueba de 30 días o la versión gratuita.En la versión gratuita, Altaro VM Backup puede respaldar los siguientes sistemas operativos como servidores físicos:Windows Server 2008 R2Windows Server 2012Windows Server 2012 R2Windows Server 2016Windows Server 2019No realiza copias de seguridad de hipervisores (hosts Hyper-V) y sistemas operativos cliente (Windows 7, 8, 10).Las versiones soportadas de VMware son las siguientes:VMware vCenter 5.0, 5.1, 5.5, 6.0, 6.5, 6.7 y 7.0VMware vSphere 5.0, 5.1, 5.5, 6.0, 6.5, 6.7 y 7.0VMware ESXi 5.0, 5.1, 5.5, 6.0, 6.5, 6.7 y 7.0(No se admite VMware ESXi gratuito)En la página de comparación de precios de Altaro VM Backup, podremos cotejar las diferencias entre las versiones de Altaro VM Backup y las limitaciones de la versión gratuita.Instalar Altaro VM BackupYa con el archivo descargado, comenzamos con la instalación de Altaro. Reading Time: 5 minutesAs Active Directory, its Domain Controllers and their inner workings were originally designed in the late 90s, some of the technologies and processes can be somewhat incompatible with technologies and ways of work that were introduced since. I haven’t stumbled upon physical Domain Controllers in a while, so I guess I can conclude that Virtual Domain Controllers are common place, these days. Server Virtualization solutions like Hyper-V and vSphere were introduced after the inception of Active Directory. Although Microsoft provides features like Virtualization Safeguards since Windows Server 2012, some actions and configurations can still bite you in the behind. Creating backups of virtual Domain Controllers using software that runs on the virtualization host, or through the virtualization host is typically a tricky aspect of the Active Directory continuity process. I work with the latest Altaro VM Backup and I have some tips for you.You may have already heard of Altaro, part of Hornetsecurity Group. Most Microsoft-oriented IT Pros know them for their free Hyper-V Dojo and publications like the Backup Bible, but it all started with backup and restore solutions. Altaro VM Backup was originally introduced in 2011 as their third product and as its second product specifically tailored to small and medium-sized businesses (SMB). Version 8 of Altaro VM Backup is the current version.Tips for Backing up virtual Domain ControllersActive Directory continuity starts with creating backups of Domain Controllers. For Domain Controllers, specifically, it means the volume shadow copy writer that are relevant to Active Directory are used to create ‘cleanly shutdown’ backups of the Active Directory database and logs, when the requirements are met.Tip! Check the VSS Settings in Altaro VM BackupOnly when Application consistent backups are created, Altaro VM Backup creates backups of Windows-based virtualization guests (OSs) automatically using the guest’s relevant Volume Snapshot Service (VSS) in addition to the host-level checkpoint. Admins can configure settings in Altaro VM Backup to use VSS writers to create Application Consistent backups. This is a configuration you absolutely want when creating backups of virtual Domain Controllers. Luckily, in Altaro VM Backup, the only thing you need toAltaro Offsite Server: Offsite-Backups sorgen f r
C’est très long. Une fois l’opération terminée, vous aurez un bouton permettant d’ouvrir l’explorateur de fichiers : La lenteur d’accès est due au format de l’image : l’image partition est morcelée en plusieurs fichiers compressés. J’ai eu des échecs d’accès au partage distant SMB, probablement dus au packaging live-CD plutôt qu’à RescueZilla lui-même. 3-2-7. Fogproject▲ Fogproject est un outil libre permettant le déploiement et le clonage de machines sur le réseau. Ce ne sera pas le meilleur outil pour ne migrer qu’une seule machine, le produit devant être installé sur une machine Linux et servant essentiellement à effectuer du déploiement. Une machine intégrée à Fogproject pourra être « capturée » (terme utilisé par le produit). Une fois la tâche de capture déclarée, la machine à capturer devra être redémarrée avec support du netboot. Celle-ci démarrera alors sur le netboot fourni par Fogproject via PXE et effectuera la capture d’une image disque avec Partclone. L’image capturée pourra alors être restaurée dans une VM ayant été préalablement préparée (visible sur le réseau utilisé par Fogproject, réglages mémoire et disque adéquat, etc.) Un tutoriel sur Fogproject est en cours de réalisation, son lien sera intégré ici une fois publié. Pour installer Fogproject, il faudra télécharger celui-ci depuis le site Web ou directement avec wget : wget 3-2-8. Retrospect▲ Retrospect est un produit disponible pour Mac et PC. Peu connu dans le monde Windows, mais acteur historique dans le monde Macintosh depuis 1989. Pour plus de détails sur celui-ci, consultez mon tutoriel sur Retrospect. 3-2-9. Altaro Physical Server Backup▲ Altaro est connu pour son produit Altaro VM Backup. Nous allons ici étudier leur produit Altaro Physical Server backup, qui permet une restauration de sa sauvegarde en VM. Altaro Physical Server Backup est gratuit. Vous ne pourrez restaurer la sauvegarde que sur Hyper-V. Altaro VM Backup gérant Hyper-V et VMWare, il est possible qu’à l’avenir Physical Server Backup soit utilisable avec VMWare. Il s’agit d’un produit serveur, il ne sera pas utilisable avec des postes standards. Cette solution sera d’autant plus pertinente si vous utilisez Altaro VM Backup qui semble avoir de bonnes performances. Une fois le produit installé sur votre serveur, vous y accéderez via une interface Web, via le port 35480. Une fois connecté, vous aurez l’écran suivant : La configuration est très simple, nous commencerons par cliquer sur « Clic here to configure backup location and schedule » : Le clic sur « set a backup location » nous présentera la boite de dialogue suivante : Une fois la destination sélectionnée, il faudra valider en cliquant sur « save » en bas à droite. Restera à confirmer en bas à droite pour enregistrer les réglages. En cliquant à gauche sur Backup, vousAltaro Offsite backup stuck at Establishing Connection : r/altaro
Microsoft Azure Stack HCI extends the data center into the cloud, allowing you to manage your on-premises workloads through Azure with a service available as an Azure subscription. As with any environment, you need to protect and be able to quickly restore data on virtual machines (VMs) hosted on hybrid infrastructure. Altaro VM Backup addresses this need by unlocking the full potential of hyperconverged infrastructure (HCI) and hybrid-cloud deployments, especially Azure Stack HCI. Seamless support for Azure Stack HCI Altaro VM backup provides seamless support for Azure Stack HCI. This means that Altaro VM Backup users can back up VMs running on this powerful hyperconverged solution that supports hybrid models, enabling organizations that need specific workloads to remain on premises to keep them local while enjoying the benefits of the cloud. This functionality is also available to managed service providers (MSPs) who use this solution to provide their customers with virtual machine backup and replication services. The edition for MSPs provides the ability to configure, manage and monitor backups and restores via a ground-breaking multi-tenant console that provides a single-pane-of glass view across all an MSP's customers. Designed with IT admins in mind, Altaro VM Backup provides robust, enterprise-level functionality that is also easy to use, affordable, and fast. Aided by an intuitive user interface (UI), users can typically install the solution and run their first backup in less than 15 minutes. Click here to learn more. With Altaro VM Backup, setting up offsite backups to a NAS without the use of the Altaro Offsite Server is possible. Without the use of the Altaro Offsite Server, you can configure offsite Altaro Offsite Server. If you're looking to replicate VM backups to an offsite location you will need to install the Altaro Offsite Server on the machine that will host the offsite backups in your remote location. The Altaro Offsite Server can be connected to the machine running an instance of Altaro VM Backup both via LAN or WAN connection.New in Altaro VM Backup - Offsite Backup to Azure
What are the system requirements for Altaro Endpoint Backup? Supported Operating SystemsAltaro Endpoint Manager (EPM)Windows Server 2016Windows Server 2016 (Core installation)Windows Server 2019Windows Server 2019 (Core installation)Altaro Endpoint Agent (EPA)Windows 7 (MS .NET Framework 4.7.2 [required for TLS1.2] and Service Pack 1)Windows 8.1Windows 10Note:Must be 64-bitHome Editions are not supportedData from NTFS formatted disks only will be backed upWindows Deduplication enabled disks are not supportedNTFS Compression enabled disks are not supportedBitlocker Volumes are supportedRequired Hardware SpecificationsAltaro Endpoint Manager (EPM)x86-64 processor8 GB RAM1 GB Hard Disk Space + an additional ≈ 300MB (during installation)Altaro Endpoint Agent (EPA)x86-64 processor2 GB RAM1 GB Hard Disk Space + an additional ≈ 300MB (during installation)Minimum of 10% free disk space on each volume holding live data to be used for Microsoft Volume Shadow CopySoftware PrerequisitesMS .NET Framework 4.7.2TLS 1.2Minimum screen resolution for the Altaro EndPoint: 1280x800All modern browsers are supported (Google Chrome is the preferred browser)Communication PortsBelow is a list of the default TCP ports used by our software and their purpose. All these ports must be allowed.Altaro Endpoint Manager (EPM)443 : Required for Communication with the Altaro Cloud Management Console35482 : Communication required for the console UI35483 : Communication required for Altaro Endpoint Agent connectionsAltaro Endpoint Agent (EPA)35481 : Communication required for the console UISupported Backup LocationsAzure Cloud Storage AccountBandwidth Requirementsa minimum connection of 1Mbps is requiredBackup ConsistencyBackups of Endpoints are taken in a File Consistent state (i.e. Backups are not VSS Application-consistent)Comments
Bandwidth Throttling for Offsite Backups / Replication If you're taking offsite backups over the WAN / VPN / Fiber connections or even running Replication and especially going over a slow connection, you might be looking to throttle the bandwidth available for the offsite backups via VM Backup.VM Backup does not offer throttling natively as it stands, but fortunately Windows gives you the functionality to do this built-in.Version 9All you have to do is open PowerShell and run the following command on the VM Backup machine and ALL Hyper-V Hosts:Syntax for Offsite Backups going to an Offsite Backup Server:New-NetQosPolicy "OBS Throttle" -IPDstPortStartMatchCondition 36000-IPDstPortEndMatchCondition 36001 -ThrottleRateActionBitsPerSecond 10000000Syntax for Offsite Backups going to a Cloud Backup Location:New-NetQosPolicy "Cloud Backup Throttle Port 80" -IPPort 80 -IPProtocol TCP -ThrottleRateActionBitsPerSecond 10000000 -AppPathNameMatchCondition 'C:\Program Files\Hornetsecurity\VMBackup\VMBackup.SubAgent.exe'New-NetQosPolicy "Cloud Backup Throttle Port 443" -IPPort 443 -IPProtocol TCP -ThrottleRateActionBitsPerSecond 10000000 -AppPathNameMatchCondition 'C:\Program Files\Hornetsecurity\VMBackup\VMBackup.SubAgent.exe'Syntax for Replication:New-NetQosPolicy "OBS Replication Throttle" -IPDstPortMatchCondition 36100 -ThrottleRateActionBitsPerSecond 10000000The ThrottleRateActionBitsPerSecond must be specified in bits. So for instance;3 Mbps = 3000000 Bits10 Mbps = 10000000 BitsNote:For VMware hosts, this only needs to be applied on the machine running VM BackupIf you wish to remove the QoS Policies, you can run the following commands:Remove-NetQosPolicy -Name "OBS Throttle"Remove-NetQosPolicy -Name "Cloud Backup Throttle Port 80"Remove-NetQosPolicy -Name "Cloud Backup Throttle Port 443"Remove-NetQosPolicy -Name "OBS Replication Throttle"Version 8All you have to do is open PowerShell and run the following command on the VM Backup machine and ALL Hyper-V Hosts:Syntax for Offsite Backups going to an Altaro Offsite Server:New-NetQosPolicy "AOS Throttle" -IPDstPortStartMatchCondition 35116 -IPDstPortEndMatchCondition 35117 -ThrottleRateActionBitsPerSecond 10000000Syntax for Offsite Backups going to a Cloud Backup Location:New-NetQosPolicy "Cloud Backup Throttle Port 80" -IPPort 80 -IPProtocol TCP -ThrottleRateActionBitsPerSecond 10000000 -AppPathNameMatchCondition 'C:\Program Files\Altaro\Altaro Backup\Altaro.Services.BackupAgent.exe'New-NetQosPolicy "Cloud Backup Throttle Port 443" -IPPort 443 -IPProtocol TCP -ThrottleRateActionBitsPerSecond 10000000 -AppPathNameMatchCondition 'C:\Program Files\Altaro\Altaro Backup\Altaro.Services.BackupAgent.exe'Syntax for Replication:New-NetQosPolicy "AOS Replication Throttle" -IPDstPortMatchCondition 35120 -ThrottleRateActionBitsPerSecond
2025-04-06Hola a tod@sEn esta oportunidad continuaremos viendo el software Altaro VM Backup y profundizando en las diferentes opciones que nos ofrece. En este post veremos en concreto como poder integrar Altaro VM Backup con Wasabi Hot Cloud Storage.Al integrar Wasabi nos permitirá almacenar nuestras copias de seguridad en una ubicación externa, lo que es ideal para fines de recuperación ante desastres. Además todas las copias de seguridad están cifradas (AES de 256 bits) de forma nativa.Prerrequisitos:Asegúrese de estar ejecutando Altaro VM Backup versión 8.5 o posterior para hacer uso de esta funciónDebes ejecutar Unlimited Plus Edition para poder acceder a esta función.Notas importantes:Cada instalación de Altaro VM Backup debe hacer uso de un Wasabi Bucket diferente.Wasabi Compliance Mode no es compatible (ya que los derechos de eliminación se limitarían solo a Wasabi).Integrar Wasabi con Altaro VM BackupPara comenzar, abrimos la consola de Altaro VM Backup.Ya en la consola, vamos a la pestaña “Backup Locations” y acto seguido pulsamos sobre “Add Offsite Location” como se muestra en la imagen.Dentro de las opciones disponibles, seleccionamos “Wasabi“.Agregamos los datos de nuestra conexión con Wasabi. Tenemos que agregar el nombre exacto de como nombramos nuestro bucket en Wasabi para evitar errores, probamos la conexión para verificar el correcto funcionamiento.Dentro de lista de máquinas virtuales disponibles en nuestra infraestructura, tomamos la(s) máquina(s) virtual(es) y la(s) arrastramos hasta “Offsite Locations“. Ya seleccionada la maquina(s) virtual(es), vamos a la parte inferior derecha de la consola y pulsamos sobre “save changes” para finalizar y guardar los cambios.Altaro VM Backup nos pedirá crear una contraseña maestra para encriptar nuestras copias de seguridad fuera del sitio.En mi caso en esta ventana, selecciono la máquina virtual que configure en “Offsite Locations” y pulso sobre “Take Offsite Copy” para comenzar el respaldo. Como podrán notar, no es posible seleccionar las demás máquinas virtuales ya que no se agregaron en pasos anteriores.En la ventana de Dashboard, podremos ver el avance de nuestra tarea de respaldo a Wasabi.Verificar respaldo en WasabiIngresamos a página de Wasabi con nuestras credenciales.Dentro de la pestaña “Buckets” vamos al bucket que configuramos en Altaro VM Backup e ingresamos en este.Ya en el bucket, podremos navegar dentro de este y ver que Altaro VM Backup creo varios archivos dentro del bucket.Con estos simples pasos podemos integrar Wasabi con nuestra solución de respaldo Altaro VM Backup y poder almacenar nuestros respaldos en la nube y así también poder cumplir con la regla de 3-2-1. Espero que esta información pueda ser de ayuda y cualquier duda, consulta o sugerencia la dejan en los comentarios. Saludos.
2025-04-20Do is put a check in the Application Consistent column for each virtual Domain Controller. You find these settings under VSS Settings in Altaro VM Backup. Tip! Check the VMware ToolsTo offer the best integration between the virtualization host and guests, VMware offers VMware Tools. Similarly, Hyper-V offers Integration Components (ICs). Hyper-V’s ICs come with the Windows Server Operating System (OS) and are automatically kept up to date through Windows Update. VMware Tools, however, need to be installed inside the virtual guest and require somewhat more effort to keep up to date.It is easy to forget to install the VMware Tools on virtual Domain Controllers. It is easy to not have the latest VMware Tools on virtual Domain Controllers. Don’t make these mistakes, as application consistent backups rely on them. Tip! Check the VSS writersWhen you create a backup of Domain Controllers using the relevant VSS writers, an event is logged in the Event log. This event has event ID 1917 with source ActiveDirectory_DomainService and is recorded in the Directory Services event log (underneath Application and Services logs).When Active Directory-aware backups do not occur, you can check the relevant VSS writers for errors:The NTDS VSS writer should report no errorsThe DFS Replication VSS writer should report no errorsBoth writers can be checked with the following line of code in an elevated Command Prompt (cmd.exe) window on a (virtual) Domain Controller:vssadmin list writersThe output of the command lists all the VSS writers on the system. The relevant VSS writers are among them. Tip! Backup to a location outside of the reach of Active DirectoryOne of the other mistakes I see admins make is to write all domain controller backups to a (networking) location that is governed by access control lists (ACLs), filled with Active Directory principals. When Active Directory is unavailable, that location is unavailable, because you gained access to it through one or more Active Directory group memberships. Make sure you create backups of Domain Controllers in locations, whose access is not governed by Active Directory or IPSec. Then, make use of the Offsite Copies functionality in Altaro VM Backup
2025-04-17