Blur photo filter
Author: r | 2025-04-23
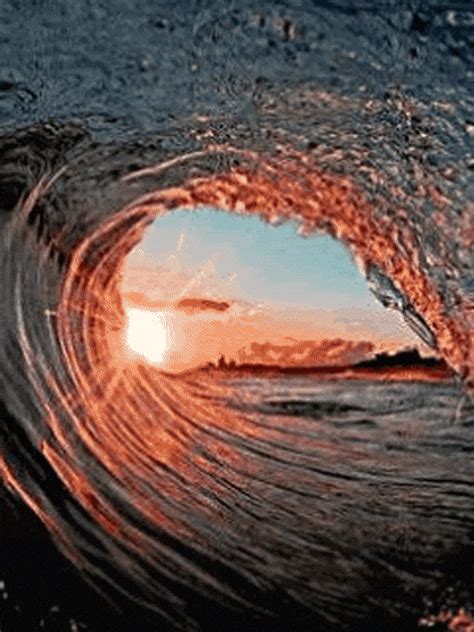
Photo Editor; Photo Templates; Blur Image Blur your images easily with Canva’s free photo blur tool. Plus, add more effects and filters to your photos with iLoveIMG. Filter. Blur. BLUR. 100%.

Soften a photo with a blur filter
The exposure of the photo, Contrast adds contrast, and Noise adds grain to the image. ON1 Effects Lens Blur: Set the overall strength and smoothness with the Amount and Optic Quality sliders ON1 Effects Lens Blur: Adjust the bokeh shape with the Sides and Curvature sliders ON1 Effects Lens Blur: Refine bokeh brightness and image tone with the Blooming, Brightness, Contrast, and Noise sliders A Portrait Example Of Lens BlurThe various Bokeh styles work well with portraits - just be prepared to do some masking. The Center shaped gradient Masking Bug works well with portraits. Position the center of the mask over your subject’s eye. That’s where you want the photo to be sharpest. Then, shape and feather the mask to create a smooth blend from sharp to blurred.The mask will likely need some cleanup. The Lens Blur filter does not have evaluate a photo for subjects and their relative depth. In this example, after adding a simple Center-shaped mask, the background over my subject’s left shoulder is still crisp. It should be softer and blurred because it is not on the same focal plane as her eye. The opposite is true for the foreground. The feathered mask added blur to her sweater, which did not look right. More manual masking is needed to clean it up and remove some of the blur from the foreground.Lens Blur is a useful tool. Yet you the photographer need to remain mindful of what should and shouldn’t get blurred. Areas of a photo are roughly on the same plane as the focus point should not be blurred, and vice versa. ON1 Effects Lens Blur: Try the Center shaped masking bug for portraits with the center on your subject’s eyes. ON1 Effects Lens Blur: Manual masking is usually necessary with the Lens Blur filter and portraits. You the photographer need to understand the depth relationship among your subjects and the plane of focus you want. Improve your ON1 Photo RAW skills with these training titles A Food Photography Example Of Lens BlurThe Lens Blur filter is readily usable for food photography. Often, food photos are singular subjects, or surrounding objects are reasonably close by. Less cleanup masking is needed. In this photo of some Belgian chocolates, a simple Center-shaped mask is all that’s needed to emphasize the primary subject and draw the viewer’s eye. ON1 Effects Lens Blur: The Center masking shape works great
Blur filter for gaussian blur type photos - photofunny.net
For close-ups like food photography. A shallow depth of field simulated with the Lens Blur filter in ON1 Effects.Contact Scott to license this image. ON1 Effects Lens Blur: Create a miniature look and feel with the Tilt Shift style. A Cityscape Miniature Look With Lens BlurEasily create a miniature model look with the Tilt Shift style in the Lens Blur filter. This style adds a Reflected Gradient shape to your photo. Position and adjust each side of the gradient independently. With elevated photos like cityscapes, the scene takes on a miniature look at feel. Like all looks with the Lens Blur filter, you have complete control over the shape and softness of the bokeh. Also, the manual masking controls can be used in conjunction with the Reflected Gradient. In this photo of Florence, Italy, after adjusting the gradient to follow the river, I used a masking brush to reduce the strength of the blur in the lower right corner. Florence Italy At DuskContact Scott to commission a print or license this image. You Might Also Enjoy These ON1 Photo RAW Posts Previous Surfers In Cardiff By The Sea Photo Of The MomentScott DavenportJune 14, 2021Surfer, San Diego, Cardiff By The Sea Next A Happy Mistake In Processing - In Post #502 In PostScott DavenportJune 10, 2021LightroomBlur Photo with Mosaic Pixel Filter
The blur special effects change the pixels of an image to soften them, smooth their edges, blend them, or create motion effects. To apply the effects that are labeled with ‘Corel PHOTO-PAINT’, you need to edit the bitmap in Corel PHOTO-PAINT. To send a bitmap to Corel PHOTO-PAINT, you can click the Edit bitmap button on the property bar, or you can use the Edit bitmap command from the Bitmaps menu. You can also enable an option that lets you access Corel PHOTO-PAINT by double-clicking a bitmap. For more information, see Edit bitmaps with Corel PHOTO-PAINT. Tune blur (Corel PHOTO-PAINT) The Tune blur effect (Effects Blur Tune blur) lets you apply any of four blurring effects, which are represented by thumbnails, to an image. You can adjust the blur effect and preview the image with softer or sharper focus while you are editing it. The Tune blur filter lets you improve image quality or create exciting visual effects. Original Tune blur Directional smooth The Directional smooth effect (Effects Blur Directional smooth) smooths the regions of gradual change in an image while preserving edge detail and texture. You can use this filter to subtly blur the edges and surfaces of images without distorting the focus. Original Directional smooth Feather The Feather effect (Effects Blur Feather) gradually increases the transparency along the edges of objects making objects blend perfectly into the background. You can specify the width of the feathered section of the object and the transparency gradient you want to use. The edge transparency can change in even increments from the beginning to the end of the feathered section (Linear edges) or in small increments at the beginning of the feathered edge, larger transparency increments in the middle, and small transparency increments at the end (Curved edges). Original Feather Gaussian blur The Gaussian blur (Effects Blur Gaussian blur) effect produces a hazy effect, blurring the focus of an image according to Gaussian distribution, which spreads the pixel information outward using bell-shaped curves. The effect can improve the quality of bitmaps with sharp edges. Move the Radius slider to adjust the intensity of the effect. The Gaussian Blur effect supports all color modes except Paletted and Black-and-White. Original Gaussian blur Jaggy despeckle The Jaggy despeckle effect (Effects Blur Jaggy despeckle) scatters colors in an image, creating a soft, blurred effect with minimal distortion. It is most effective for removing the jagged edges that can appear in line art or high-contrast images. The Jaggy despeckle effect is also a preset lens type. Original Jaggy despeckle Low pass The Low pass effect (Effects Blur Low pass) removes sharp edges and detail from an image, leaving smooth gradients and low-frequency areas. The higher the settings you specify, the more image detail is erased. Original Low pass Motion blur The Motion blur effect (Effects Blur Motion blur) creates the illusion of movement in an image. You can specify the direction of movement. Original Motion blur Radial blur The Radial blur effect (Effects Blur Radial blur) creates. Photo Editor; Photo Templates; Blur Image Blur your images easily with Canva’s free photo blur tool. Plus, add more effects and filters to your photos with iLoveIMG. Filter. Blur. BLUR. 100%. Photo Editor; Photo Templates; Blur Image Blur your images easily with Canva’s free photo blur tool. Plus, add more effects and filters to your photos with iLoveIMG. Filter. Blur. BLUR. 100%.Zoom Blur Filter In Affinity Photo
Results.To make the VHS effect use the Anaglyph 3D filter, the Color Fringe filter or both filters.Create an old VHS effect using this free VHS overlay. Go to Elements > Photos and search for the VHS overlay. Then, set the blend mode to Screen. Also, apply the Anaglyph filter to the VHS texture. To make the old TV effect, use the Noise filter or the Film Grain filter. The VHS effect is a very popular 90s photo effect. But, with MockoFun you can make any 90s edit using the photo filters.9. Vignette Filter [Vintage Photo Effect]In photography and optics, vignetting is a reduction of an image’s brightness or saturation toward the periphery compared to the image center. With MockoFun you can add vignette to photo with our premium Vignette photo filter. You can set the size of the photo vignette (Feather) and also the color of the photo vignette(Amount). Add a vignette border online with MockoFun. It’s easy!With the Vignette filter you have two vignette effect options:Black Vignette. Set the Amount higher than 0 and create a a black vignette.White Vignette. An Amount lower than 0 will produce a white vignette. With a white vignette you can fade image online.If you don’t have 👑 premium user account you can still add vignette to photo. To make photo vignette use a vignette PNG from our gallery. Go to Elements > Frames and search for Vignette. We have 3 vignette png images to choose from. You can set the color of the vignette png image by adding a Duotone filter. You can also add a Blur filter to the vignette frame. Create a white vignette png or a black vignette png in just a few seconds. Then, download the PNG vignette image.Fade edges of photo with MockoFun. To blur edges of photo you can use the image called Blur Circle Mask from Elements > Frames > Vignette&Mask. Scale the image to make an ellipse shape and use this shape as mask for your photo.10. Light Leak Filter [Vintage Photo Effect]What is light leak? A light leak is a hole or gap in the body of a camera, or other optical instrument, where light is able to “leak” into the normally light-tight chamber, exposing the film or sensor with extra light.Within the Lomography movement the light leak effect is seen as a positive effect, giving photos character.Since 1990s there has been interest in the artistic use of toy cameras and many professional photographers have used them for the vignetting, blur, light leaks, and other distortions. Go to Elements > Effects > Light Leaks and use the light leak textures to add light leaks to photos online. This is a light leak overlay not a light leak png image so you have to use the Screen blend mode.Light leak effect that you can use for your vintage pictures. With the MockoFun photo editor you can easily add light leak overlays to photos.This is a free photo template with two light leak textures to chooseAffinity Photo Tutorial - Zoom Blur Filter
" data-block-json="{"blockAnimation":"none","layout":"caption-hidden","overlay":true,"description":{"html":""},"customThumb":"60c02c2479907f3d050b765d","html":"","url":" data-block-type="32" id="block-af4bb37fa78dcd4111a2"> If you are trying ON1 Photo RAW 2021, the ON1 plug-ins, or upgrading from an older version, please consider using my affiliate link. There is no extra cost to you and it helps support ON1 tutorials like this one. Ready to buy? Use the offer code SDP20 at checkout and SAVE 20%!The Lens Blur filter creates blurring effects that simulate a shallower depth of field. This filter adds bokeh to a scene, including controls over the shape and number of sides the bokeh shapes have. Lens Blur is useful for portrait work and food or product photography. The tilt-shift style is also helpful for certain cityscape scenes. Lens Blur And MaskingIt’s rare that you’d add a Lens Blur effect to your entire photo, so be prepared to use your masking tools with this filter. Many of the built-in styles add a mask automatically. Styles like Tilt Shift and Sides use a reflected gradient to blur opposite edges of a photo. Other styles like Soft Vignette include an oval-shaped mask. The Bokeh styles do not apply a mask by default. Lens Blur ControlsThe Lens Blur filter has three sections of sliders. At the top, the Amount slider controls the overall intensity of the blur and the Optic Quality slider adjusts the smoothness or coarseness of the blurred areas. Like all filters in ON1 Effects, the Lens Blur filter has an overall Opacity slider (above the styles) that can lower the strength of the effect. I don’t advocate using Opacity to control the blur strength because the results usually have artifacts or look smudgy. Use the Amount slider instead.In the Aperture section, the two controls, Sides and Curvature, control the shape of the bokeh. Try this as an experiment to see how the two sliders work. Lower the Curvature slider to 10 or less. Next, change the value of Sides. You’ll see the shape of the bokeh change. A value of 3 makes a triangle, 4 makes a diamond, 5 makes a pentagon, and so on. Raising Curvature rounds the individual sides of the bokeh, given you complete control over stylized bokeh shapes or smooth bokeh balls.At the bottom are four other sliders. Blooming is the most specific to Lens Blur, adjusting the brightness of the bokeh. The other sliders, Brightness, Contrast, and Noise adjust the entire image and do exactly what you’d expect they do. Brightness adjustsHow to Blur, Filter, and Adjust Photos - Facebook
كتابة نص المفاجئة على الصورة على إنستا المفاجئة الموافقة المسبقة عن علم محرر الصور Create amazing photos with snap style photo filters and easily you can share your photos on any social app.Also apply photo effects on your photos.snap Photo Filter - Sticker have many filter and sticker likedoggy, rabbit, cat face stickersrainbow, tears stickers100+ emoji sticker & photo stickersEasy to write on photos with new snap text features.you can write your text and add emoji together on snap text.with snap text effect you can set wishes on photos.snap Photo Filter - Sticker have wonderful Features- snap TextSet text and emoji on your photos and move up or down as you want.- Photo FiltersOver 100+ amazing filter and set filter on your photos - Cool StickersMany Sticker are available so you can put sticker on your photos- Blur BackgroundAdjust blur background easily on your finger- Photo EffectsHaving many effect so you can apply photo effects on your snap photos.- ShareEasy to share your work on Facebook, Instagram, Twitter and any other social app.Any other idea for adding any other features in our snap app then please give your precious feedback us and please rate us.Thank you for downloading our app. معلومات أكثر ل تطبيق احدث اصدار 1.0 Android متطلبات النظام Android 4.1+ تحديث لأحدث إصدار 1.0 Last updated on 21/10/2016 Minor bug fixes and improvements. Install or update to the newest version to check it out! Snap Photo Filters & Stickers لقطات الشاشة. Photo Editor; Photo Templates; Blur Image Blur your images easily with Canva’s free photo blur tool. Plus, add more effects and filters to your photos with iLoveIMG. Filter. Blur. BLUR. 100%. Photo Editor; Photo Templates; Blur Image Blur your images easily with Canva’s free photo blur tool. Plus, add more effects and filters to your photos with iLoveIMG. Filter. Blur. BLUR. 100%.Comments
The exposure of the photo, Contrast adds contrast, and Noise adds grain to the image. ON1 Effects Lens Blur: Set the overall strength and smoothness with the Amount and Optic Quality sliders ON1 Effects Lens Blur: Adjust the bokeh shape with the Sides and Curvature sliders ON1 Effects Lens Blur: Refine bokeh brightness and image tone with the Blooming, Brightness, Contrast, and Noise sliders A Portrait Example Of Lens BlurThe various Bokeh styles work well with portraits - just be prepared to do some masking. The Center shaped gradient Masking Bug works well with portraits. Position the center of the mask over your subject’s eye. That’s where you want the photo to be sharpest. Then, shape and feather the mask to create a smooth blend from sharp to blurred.The mask will likely need some cleanup. The Lens Blur filter does not have evaluate a photo for subjects and their relative depth. In this example, after adding a simple Center-shaped mask, the background over my subject’s left shoulder is still crisp. It should be softer and blurred because it is not on the same focal plane as her eye. The opposite is true for the foreground. The feathered mask added blur to her sweater, which did not look right. More manual masking is needed to clean it up and remove some of the blur from the foreground.Lens Blur is a useful tool. Yet you the photographer need to remain mindful of what should and shouldn’t get blurred. Areas of a photo are roughly on the same plane as the focus point should not be blurred, and vice versa. ON1 Effects Lens Blur: Try the Center shaped masking bug for portraits with the center on your subject’s eyes. ON1 Effects Lens Blur: Manual masking is usually necessary with the Lens Blur filter and portraits. You the photographer need to understand the depth relationship among your subjects and the plane of focus you want. Improve your ON1 Photo RAW skills with these training titles A Food Photography Example Of Lens BlurThe Lens Blur filter is readily usable for food photography. Often, food photos are singular subjects, or surrounding objects are reasonably close by. Less cleanup masking is needed. In this photo of some Belgian chocolates, a simple Center-shaped mask is all that’s needed to emphasize the primary subject and draw the viewer’s eye. ON1 Effects Lens Blur: The Center masking shape works great
2025-04-12For close-ups like food photography. A shallow depth of field simulated with the Lens Blur filter in ON1 Effects.Contact Scott to license this image. ON1 Effects Lens Blur: Create a miniature look and feel with the Tilt Shift style. A Cityscape Miniature Look With Lens BlurEasily create a miniature model look with the Tilt Shift style in the Lens Blur filter. This style adds a Reflected Gradient shape to your photo. Position and adjust each side of the gradient independently. With elevated photos like cityscapes, the scene takes on a miniature look at feel. Like all looks with the Lens Blur filter, you have complete control over the shape and softness of the bokeh. Also, the manual masking controls can be used in conjunction with the Reflected Gradient. In this photo of Florence, Italy, after adjusting the gradient to follow the river, I used a masking brush to reduce the strength of the blur in the lower right corner. Florence Italy At DuskContact Scott to commission a print or license this image. You Might Also Enjoy These ON1 Photo RAW Posts Previous Surfers In Cardiff By The Sea Photo Of The MomentScott DavenportJune 14, 2021Surfer, San Diego, Cardiff By The Sea Next A Happy Mistake In Processing - In Post #502 In PostScott DavenportJune 10, 2021Lightroom
2025-04-17Results.To make the VHS effect use the Anaglyph 3D filter, the Color Fringe filter or both filters.Create an old VHS effect using this free VHS overlay. Go to Elements > Photos and search for the VHS overlay. Then, set the blend mode to Screen. Also, apply the Anaglyph filter to the VHS texture. To make the old TV effect, use the Noise filter or the Film Grain filter. The VHS effect is a very popular 90s photo effect. But, with MockoFun you can make any 90s edit using the photo filters.9. Vignette Filter [Vintage Photo Effect]In photography and optics, vignetting is a reduction of an image’s brightness or saturation toward the periphery compared to the image center. With MockoFun you can add vignette to photo with our premium Vignette photo filter. You can set the size of the photo vignette (Feather) and also the color of the photo vignette(Amount). Add a vignette border online with MockoFun. It’s easy!With the Vignette filter you have two vignette effect options:Black Vignette. Set the Amount higher than 0 and create a a black vignette.White Vignette. An Amount lower than 0 will produce a white vignette. With a white vignette you can fade image online.If you don’t have 👑 premium user account you can still add vignette to photo. To make photo vignette use a vignette PNG from our gallery. Go to Elements > Frames and search for Vignette. We have 3 vignette png images to choose from. You can set the color of the vignette png image by adding a Duotone filter. You can also add a Blur filter to the vignette frame. Create a white vignette png or a black vignette png in just a few seconds. Then, download the PNG vignette image.Fade edges of photo with MockoFun. To blur edges of photo you can use the image called Blur Circle Mask from Elements > Frames > Vignette&Mask. Scale the image to make an ellipse shape and use this shape as mask for your photo.10. Light Leak Filter [Vintage Photo Effect]What is light leak? A light leak is a hole or gap in the body of a camera, or other optical instrument, where light is able to “leak” into the normally light-tight chamber, exposing the film or sensor with extra light.Within the Lomography movement the light leak effect is seen as a positive effect, giving photos character.Since 1990s there has been interest in the artistic use of toy cameras and many professional photographers have used them for the vignetting, blur, light leaks, and other distortions. Go to Elements > Effects > Light Leaks and use the light leak textures to add light leaks to photos online. This is a light leak overlay not a light leak png image so you have to use the Screen blend mode.Light leak effect that you can use for your vintage pictures. With the MockoFun photo editor you can easily add light leak overlays to photos.This is a free photo template with two light leak textures to choose
2025-04-09