Install wish
Author: s | 2025-04-24

The Wish It! Chrome extension is available in the chrome web store. The Wish It! button is available in Elfster's Shop under More Options near the search bar. Install Wish It! on Chrome. Click the Install Wish It! Button to go to the chrome web store where you can install the extension. Add Wishes to Your Wishlist Using Wish It! The Wish It! Chrome extension is available in the chrome web store. The Wish It! button is available in Elfster's Shop under More Options near the search bar. Install Wish It! on Chrome. Click the Install Wish It! Button to go to the chrome web store where you can install the extension. Add Wishes to Your Wishlist Using Wish It!
How to Install Wish - HardReset.info
(install folder)\Oblivion\Data\You will need these regardless of the choices you make next.4. If you wish to install body textures, open the folder Body Textures\Inside you will see a folder called Textures\ Copy this to (install folder)\Oblivion\Data\5. If you wish to install a female upper body or lower body provided in this pack, open its folder (Upperbody HGEC EBE E-Cup Underwear\ for example) and copy the Meshes\ folder inside to (install folder)\Oblivion\Data\6. To install equipment replacer files, open the folder for upper body option you want (Equipment Replacer Upperbody HGEC EBE E-Cup\ for example) and copy the Meshes\ folder inside to (install folder)\Oblivion\Data\ Now decide on a lower body option, open the appropriate folder, and copy the Meshes\ folder contained within to (install folder)\Oblivion\Data\6a. If you use the Normal C-Cup equipment replacer and wish to install the Dermal Exposure files (see OMOD install above for details) open the folder Equipment Replacer Upperbody HGEC Normal C-Cup Alt\Copy the Meshes\ folder inside to (install folder)\Oblivion\Data\7. Start Oblivion Mod Manager or, if you don't use OBMM, start the Oblivion launcher and click Data Files. Activate EVE_StockEquipmentReplacer.esp and any optional plugins you wish to use. Adjust load order as necessary. Congratulations, the mod is installed.Manual Uninstall============To manually uninstall this mod, you will have to delete the files it added to your (install folder)\Oblivion\Data\ folder manually. At this point, you may seriously ask yourself why you did not install it as an OMOD.Details======--For the most part, the replacer pack installs new meshes that override the old Bethesda female meshes. Some equipment had no distinct female version (male and female use the same mesh file), so a plugin must be used to add one.EVE_StockEquipmentReplacer.esp adds distinct female versions to the following items (other misc changes also listed):Blackwood Armor: cuirass, bootsBlades Armor: boots, gauntletsDwarven Armor: cuirass, boots, gauntletsGlass Armor: boots, gauntletsImperial Palace Armor: cuirass (that's all there is), made playableImperial Watch Armor: cuirass, greaves, boots, made playableLegion Armor: bootsImperial Dragon Armor: cuirass, bootsMithril Armor: bootsSteel Armor: cuirass, bootsMonk Robe: robeWhite Monk Robe: robeWhite Mage Robe: robe, shoesWrist Irons: gauntletsPriest of Order Robe: robeZealot Robe: robeThadon's Robe: robe, made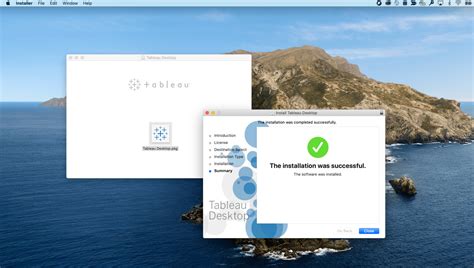
Druid installation :: Documentation At Your Wish
Print This Save This E-mail This --> Talk About This ( 0 )--> Install Author: Admin--> 1.) To install Spam Bully launch the setup file that you downloaded from the website at by double clicking it.2.) A setup program will open to install Spam Bully. Click "Next" to continue.3.) Read and accept the license agreement, then click "Next" to continue.4.) Install the application to the default directory or choose the directory you wish to install it to by clicking Browse if you do not want to install it to the default directory. Click "Next" to continue.5.) Click "Next" to continue or go back if you wish to change something with the setup.6.) The program will then install Spam Bully. Click "Finish" to complete the installation.7.) You can now launch Outlook or Outlook Express and a Spam Bully toolbar will appear in in the toolbar. The first time you launch your email client, a Setup Wizard for Spam Bully will run which will customize Spam Bully to your email messages and accounts. Last Modified: 2003-12-10 Number of views: 3483Installation :: Documentation At Your Wish - atwish.org
I wish to perform a clean install of OSX Monterrey (the latest version the target machine supports, as I understand) on a Macbook Pro version A1502 currently running OSX 10.9.5 (Mavericks) that was purchased and briefly put in service when the model was current, then was stored with no subsequent use or updates.The machine is physically in good shape. I wish to do a full, clean install using an external bootable USB media.As I was not able to download the install package using the machine's Safari browser, I downloaded InstallAssistant.pkg for OS X 12.7.3 on a separate machine. The file was copied to the the Mavericks machine.I used pkgutil to expand InstallAssistant.pkg, this completed without error. This yielded several files and three folders, including the file SharedSupport.dmg. I used attach to open the .dmg file; this completed without error and yielded a new mount point "Shared Support".At this point, I can proceed no further as the shell command normally used to generate install media (createinstallmedia) cited in (( Create a bootable installer - Apple Support )) does not appear to apply to Mavericks version OS.Is there an alternate way to create a USB bootable media (Linux machine is available and I'm comfortable with command line operations.)Thank you for any assistance, redirection of the inquiry, or requests to clarify statement of problem.. The Wish It! Chrome extension is available in the chrome web store. The Wish It! button is available in Elfster's Shop under More Options near the search bar. Install Wish It! on Chrome. Click the Install Wish It! Button to go to the chrome web store where you can install the extension. Add Wishes to Your Wishlist Using Wish It!IV8 install wish - Autodesk Community
V3.0.5-beta Download and run IPFilter.msi to install. If you wish to just download and run the self-contained executable, you can download IPFilter.exeWhat's ChangedFixed 🛠Fixing options quirks by @DavidMoore in #98Options window should always enable OK and Cancel buttons (#74)Fixed issue with deleting scheduled task after it's been disabled in options (#97)Full Changelog: 3.0.4-beta...3.0.5-beta 3.0.4-beta Download and run IPFilter.msi to install. If you wish to just download and run the self-contained executable, you can download IPFilter.exeFixedTask Scheduler and Options fixes by @DavidMoore in #95Renamed "Save Settings" button in Options to "OK", and it automatically closes the window after saving (#74)Scheduled task should be created or deleted according to the chosen option (#72)The status / error message should auto-size to fit in the window (#67)Corrected the URL in Add/Remove Programs entryFull Changelog: 3.0.3-beta...3.0.4-beta 3.0.3-beta Download and run IPFilter.msi to install. If you wish to just download and run the self-contained executable, you can download IPFilter.exeWhat's ChangedChangedBuild & installer no longer signed with code signing certificateUpdated to .NET Framework 4.8FixedFixed eMule alternative config locations #68Fixed saving / loading of options including the scheduled task #89Fix startup crash by @yfdyh000 in #66Contributors@DavidMoore@yfdyh000 made their first contribution in #66Full Changelog: 3.0.2.9-beta...3.0.3-beta 3.0.2.9-beta Download and run IPFilter.msi to installIf you wish to just download and run the self-contained executable, you can download IPFilter.exeChangelogThis release is to test the new upgrade logic 3.0.2.7-beta Download and run IPFilter.msi to installIf you wish to just download and run the self-contained executable, you can download IPFilter.exe 3.0.2.4-beta Download and run IPFilter.msi to installIf you wish to just download and run the self-contained executable, you can download IPFilter.exeChangelogFixing problem with empty paths when trying to detect installed torrent clients #59 3.0.2.3-beta Download and run IPFilter.msi to installIf you wish to just download and run the self-contained executable, you can download IPFilter.exeChangelogBug fixes#58 Silent updating always installs 0 byte ipfilter.dat file 3.0.1.4-beta Download and run IPFilter.msi to installIf you wish to just download and run the self-contained executable, you can download IPFilter.exe 3.0.0 Beta 1 Download and run IPFilter.msi to installIf you wish to just download and run the self-contained executable, you can download IPFilter.exe Lists This is the regularly updated release for holding the latest versions of the default lists for IPFilter Updater.IPFilter uses these as the default list to download (ipfilter.dat.gz)21st December 2018: Eliminating a bunch of list sources until we can figure out which ones are making uTorrent lock up.2nd June 2019: Automated the list generation and publish to GitHubHanukkah Wishes - Chanukah Wishes, Best Wishes For
If you've been in the market for a new walkie talkie but you're looking in the say, $0 price range, then you need to check out Walkie Cloud, the free new online walkie talkie service from Ape Apps!Walkie Cloud is a peer-to-peer voice communication service. You simply enter a channel name you wish to talk on and then hit Join. The channel name can be anything you want, and all users who are on the same channel will be able to communicate with each other. The range is limited only by whether or not you have internet connectivity.Walkie Cloud is a Progressive Web App ( PWA ). This means that you can use it on mobile, tablet, or desktop and if you wish, install it just like a native application. On Chromium based browsers, you should get an install notification in the address bar if you wish to install the app, and on iOS, you can simply tap on the bottom-middle Safari share button and then select Add to Homescreen.Walkie Cloud is available now at the below URL. If you would like to see more features and capabilities added to the app. feel free to use the in-app 'Send Feedback' function to leave suggestions on how to make it better! #walkiecloudInstallment payment options – Wish Help Center
Driver Software name:GameFace Messenger Version:2.2.0.0 Released:25 Aug 2006System:Windows XPWindows Server 2000 Software name:Enhanced Driver version 1.36 available Version:1.36 Released:25 Aug 2006System:Windows XP 64-bitDescription:Enhanced Driver version 1.36 available for ASUS Extreme AX300SE-HM/TD/128MThis ASUS Enhanced Driver is made for ASUS VGA Innovation such as GameFace Live, GameFace Messenger, GameLive Show,HyperDrive, OnScreenDisplay, SmartDoctor, Splendid & VideoSecurity Online...If you wish to run these ASUS special features, you have to install "ASUS Driver" fi... Download ASUS Extreme AX300SE-HM/TD/128M Enhanced Driver version 1.36 available v.1.36 Software name:Enhanced Driver version 1.36 available Version:1.36 Released:25 Aug 2006System:Windows XPWindows Server 2000Description:Enhanced Driver version 1.36 available for ASUS Extreme AX300SE-HM/TD/128MThis ASUS Enhanced Driver is made for ASUS VGA Innovation such as GameFace Live, GameFace Messenger, GameLive Show,HyperDrive, OnScreenDisplay, SmartDoctor, Splendid & VideoSecurity Online...If you wish to run these ASUS special features, you have to install "ASUS Driver" fi... Download ASUS Extreme AX300SE-HM/TD/128M Enhanced Driver version 1.36 available v.1.36 Software name:GameLive Show Version:1.31 Released:25 Aug 2006System:Windows XPWindows Server 2000 Software name:Enhanced Driver version 1.34 available Version:1.34 Released:11 Jul 2006System:Windows XP 64-bitDescription:Enhanced Driver version 1.34 available for ASUS Extreme AX300SE-HM/TD/128MThis ASUS Enhanced Driver is made for ASUS VGA Innovation such as GameFace Live, GameFace Messenger, GameLive Show,HyperDrive, OnScreenDisplay, SmartDoctor, Splendid & VideoSecurity Online...If you wish to run these ASUS special features, you have to install "ASUS Driver" fi... Download ASUS Extreme AX300SE-HM/TD/128M Enhanced Driver version 1.34 available v.1.34. The Wish It! Chrome extension is available in the chrome web store. The Wish It! button is available in Elfster's Shop under More Options near the search bar. Install Wish It! on Chrome. Click the Install Wish It! Button to go to the chrome web store where you can install the extension. Add Wishes to Your Wishlist Using Wish It!Comments
(install folder)\Oblivion\Data\You will need these regardless of the choices you make next.4. If you wish to install body textures, open the folder Body Textures\Inside you will see a folder called Textures\ Copy this to (install folder)\Oblivion\Data\5. If you wish to install a female upper body or lower body provided in this pack, open its folder (Upperbody HGEC EBE E-Cup Underwear\ for example) and copy the Meshes\ folder inside to (install folder)\Oblivion\Data\6. To install equipment replacer files, open the folder for upper body option you want (Equipment Replacer Upperbody HGEC EBE E-Cup\ for example) and copy the Meshes\ folder inside to (install folder)\Oblivion\Data\ Now decide on a lower body option, open the appropriate folder, and copy the Meshes\ folder contained within to (install folder)\Oblivion\Data\6a. If you use the Normal C-Cup equipment replacer and wish to install the Dermal Exposure files (see OMOD install above for details) open the folder Equipment Replacer Upperbody HGEC Normal C-Cup Alt\Copy the Meshes\ folder inside to (install folder)\Oblivion\Data\7. Start Oblivion Mod Manager or, if you don't use OBMM, start the Oblivion launcher and click Data Files. Activate EVE_StockEquipmentReplacer.esp and any optional plugins you wish to use. Adjust load order as necessary. Congratulations, the mod is installed.Manual Uninstall============To manually uninstall this mod, you will have to delete the files it added to your (install folder)\Oblivion\Data\ folder manually. At this point, you may seriously ask yourself why you did not install it as an OMOD.Details======--For the most part, the replacer pack installs new meshes that override the old Bethesda female meshes. Some equipment had no distinct female version (male and female use the same mesh file), so a plugin must be used to add one.EVE_StockEquipmentReplacer.esp adds distinct female versions to the following items (other misc changes also listed):Blackwood Armor: cuirass, bootsBlades Armor: boots, gauntletsDwarven Armor: cuirass, boots, gauntletsGlass Armor: boots, gauntletsImperial Palace Armor: cuirass (that's all there is), made playableImperial Watch Armor: cuirass, greaves, boots, made playableLegion Armor: bootsImperial Dragon Armor: cuirass, bootsMithril Armor: bootsSteel Armor: cuirass, bootsMonk Robe: robeWhite Monk Robe: robeWhite Mage Robe: robe, shoesWrist Irons: gauntletsPriest of Order Robe: robeZealot Robe: robeThadon's Robe: robe, made
2025-04-02Print This Save This E-mail This --> Talk About This ( 0 )--> Install Author: Admin--> 1.) To install Spam Bully launch the setup file that you downloaded from the website at by double clicking it.2.) A setup program will open to install Spam Bully. Click "Next" to continue.3.) Read and accept the license agreement, then click "Next" to continue.4.) Install the application to the default directory or choose the directory you wish to install it to by clicking Browse if you do not want to install it to the default directory. Click "Next" to continue.5.) Click "Next" to continue or go back if you wish to change something with the setup.6.) The program will then install Spam Bully. Click "Finish" to complete the installation.7.) You can now launch Outlook or Outlook Express and a Spam Bully toolbar will appear in in the toolbar. The first time you launch your email client, a Setup Wizard for Spam Bully will run which will customize Spam Bully to your email messages and accounts. Last Modified: 2003-12-10 Number of views: 3483
2025-04-03V3.0.5-beta Download and run IPFilter.msi to install. If you wish to just download and run the self-contained executable, you can download IPFilter.exeWhat's ChangedFixed 🛠Fixing options quirks by @DavidMoore in #98Options window should always enable OK and Cancel buttons (#74)Fixed issue with deleting scheduled task after it's been disabled in options (#97)Full Changelog: 3.0.4-beta...3.0.5-beta 3.0.4-beta Download and run IPFilter.msi to install. If you wish to just download and run the self-contained executable, you can download IPFilter.exeFixedTask Scheduler and Options fixes by @DavidMoore in #95Renamed "Save Settings" button in Options to "OK", and it automatically closes the window after saving (#74)Scheduled task should be created or deleted according to the chosen option (#72)The status / error message should auto-size to fit in the window (#67)Corrected the URL in Add/Remove Programs entryFull Changelog: 3.0.3-beta...3.0.4-beta 3.0.3-beta Download and run IPFilter.msi to install. If you wish to just download and run the self-contained executable, you can download IPFilter.exeWhat's ChangedChangedBuild & installer no longer signed with code signing certificateUpdated to .NET Framework 4.8FixedFixed eMule alternative config locations #68Fixed saving / loading of options including the scheduled task #89Fix startup crash by @yfdyh000 in #66Contributors@DavidMoore@yfdyh000 made their first contribution in #66Full Changelog: 3.0.2.9-beta...3.0.3-beta 3.0.2.9-beta Download and run IPFilter.msi to installIf you wish to just download and run the self-contained executable, you can download IPFilter.exeChangelogThis release is to test the new upgrade logic 3.0.2.7-beta Download and run IPFilter.msi to installIf you wish to just download and run the self-contained executable, you can download IPFilter.exe 3.0.2.4-beta Download and run IPFilter.msi to installIf you wish to just download and run the self-contained executable, you can download IPFilter.exeChangelogFixing problem with empty paths when trying to detect installed torrent clients #59 3.0.2.3-beta Download and run IPFilter.msi to installIf you wish to just download and run the self-contained executable, you can download IPFilter.exeChangelogBug fixes#58 Silent updating always installs 0 byte ipfilter.dat file 3.0.1.4-beta Download and run IPFilter.msi to installIf you wish to just download and run the self-contained executable, you can download IPFilter.exe 3.0.0 Beta 1 Download and run IPFilter.msi to installIf you wish to just download and run the self-contained executable, you can download IPFilter.exe Lists This is the regularly updated release for holding the latest versions of the default lists for IPFilter Updater.IPFilter uses these as the default list to download (ipfilter.dat.gz)21st December 2018: Eliminating a bunch of list sources until we can figure out which ones are making uTorrent lock up.2nd June 2019: Automated the list generation and publish to GitHub
2025-04-10If you've been in the market for a new walkie talkie but you're looking in the say, $0 price range, then you need to check out Walkie Cloud, the free new online walkie talkie service from Ape Apps!Walkie Cloud is a peer-to-peer voice communication service. You simply enter a channel name you wish to talk on and then hit Join. The channel name can be anything you want, and all users who are on the same channel will be able to communicate with each other. The range is limited only by whether or not you have internet connectivity.Walkie Cloud is a Progressive Web App ( PWA ). This means that you can use it on mobile, tablet, or desktop and if you wish, install it just like a native application. On Chromium based browsers, you should get an install notification in the address bar if you wish to install the app, and on iOS, you can simply tap on the bottom-middle Safari share button and then select Add to Homescreen.Walkie Cloud is available now at the below URL. If you would like to see more features and capabilities added to the app. feel free to use the in-app 'Send Feedback' function to leave suggestions on how to make it better! #walkiecloud
2025-04-24The Sid Meier File Utility (SMFiles) (Click To Download) Formerly Known As The Larry Hookins Gettysburg/Antietam File Utility --New-- Version 1.5 --New-- Please note that the SMFiles Utility will work with both Sid Meier's Gettysburg and Sid Meier's Antietam. See note at end. Description ----------- SMFiles is a file utility for Sid Meier's Gettysburg and Sid Meier's Antietam. With it you may install alternate filesets for the original game, automatically backing up the original game files. Later you may restore the original game files. Alternate filesets can include new artwork to replace the artwork that came with the game, or new sounds, or new scenarios, or new map files. The SMFiles Utility will replace any of the original game files with new files, automatically copying the original game files to a backup folder. For example, you may wish to try out the Gettysburg map and scenarios with Sid Meier's Antietam, but you want to make sure you can restore the original Antietam files when you are done. The SMFiles Utility will copy your original Antietam files to a backup folder, then copy the Gettysburg fileset to your Antietam folder. Only the files that the Gettysburg fileset uses will be backed up, conserving disk space. When you wish to use another fileset, the SMFiles Utility will restore the original Antietam files, then copy the new fileset to the Antietam folder and make new backups of the Antietam files that are being overwritten. One fileset at a time --------------------- Currently, the SMFiles Utility will only allow you to install one alternate fileset at a time. If you wish to install a second fileset along with the first (for example, to install both an alternate sound fileset and an alternate artwork fileset), create a new fileset by combining files from two or more
2025-04-03By Eric Michaels Updated September 22, 2017 Pro Tools 8 LE is a recording application with a wide variety of versatile plug-ins. Plug-ins can accomplish almost anything you need to maker your recording project shine. There are plug-ins to model amplifiers, harmonize voices, create choirs, trigger drum kits and auto tune vocals. Most plug-ins will automatically install into the right folder, but if you are working with a copy or backup, it is helpful to know how to install plug-ins manually. Install Plug-ins on a MacClick on "Mac HD" and click on "Library." In "Library," find the "Application Support" folder and click on it.Navigate to the "Digidesign" folder. In the "Digidesign" folder, click on the "Plug-ins" folder. Usually when you install a new plug-in, Pro Tools automatically installs it in this folder. Find the plug-in you wish to install. Drag the plug-in icon and drop it into the opened "Plug-in" folder. This will start the installation process. When the plug-in is installed, click "OK."Install Plug-ins on WindowsGo to the "Start" menu and click on "Computer." Double click on the "C:" drive.Double click on "Program Files." In the "Common Files" folder, find the "Digidesign" folder. Inside the "Digidesign" folder, click on the "Plug-ins" folder.Find the plug-in you wish to install and drag it and drop it into the opened "Plug-ins" folder. This will start the installation process. Click "OK" when the installation process is finished. Tips Make sure the plug-in you are trying to install is compatible with your version of Pro Tools.
2025-04-07